Assignment 3: Sectioning Hair and Preparing For Beading Row 2
Choose a language


Assignment 3: Section and Prepare the Hair for Beading
Begin your practice on your mannequin. After watching The Sectioning Row 2 video, practice sectioning and preparing the hair for the second row of extensions.
After completing the assignment, take a picture of your work and send it to your mentor labeled as Assignment 3: Sectioning Hair and Preparing for Beading Row 2.
Tools you will need for this assignment
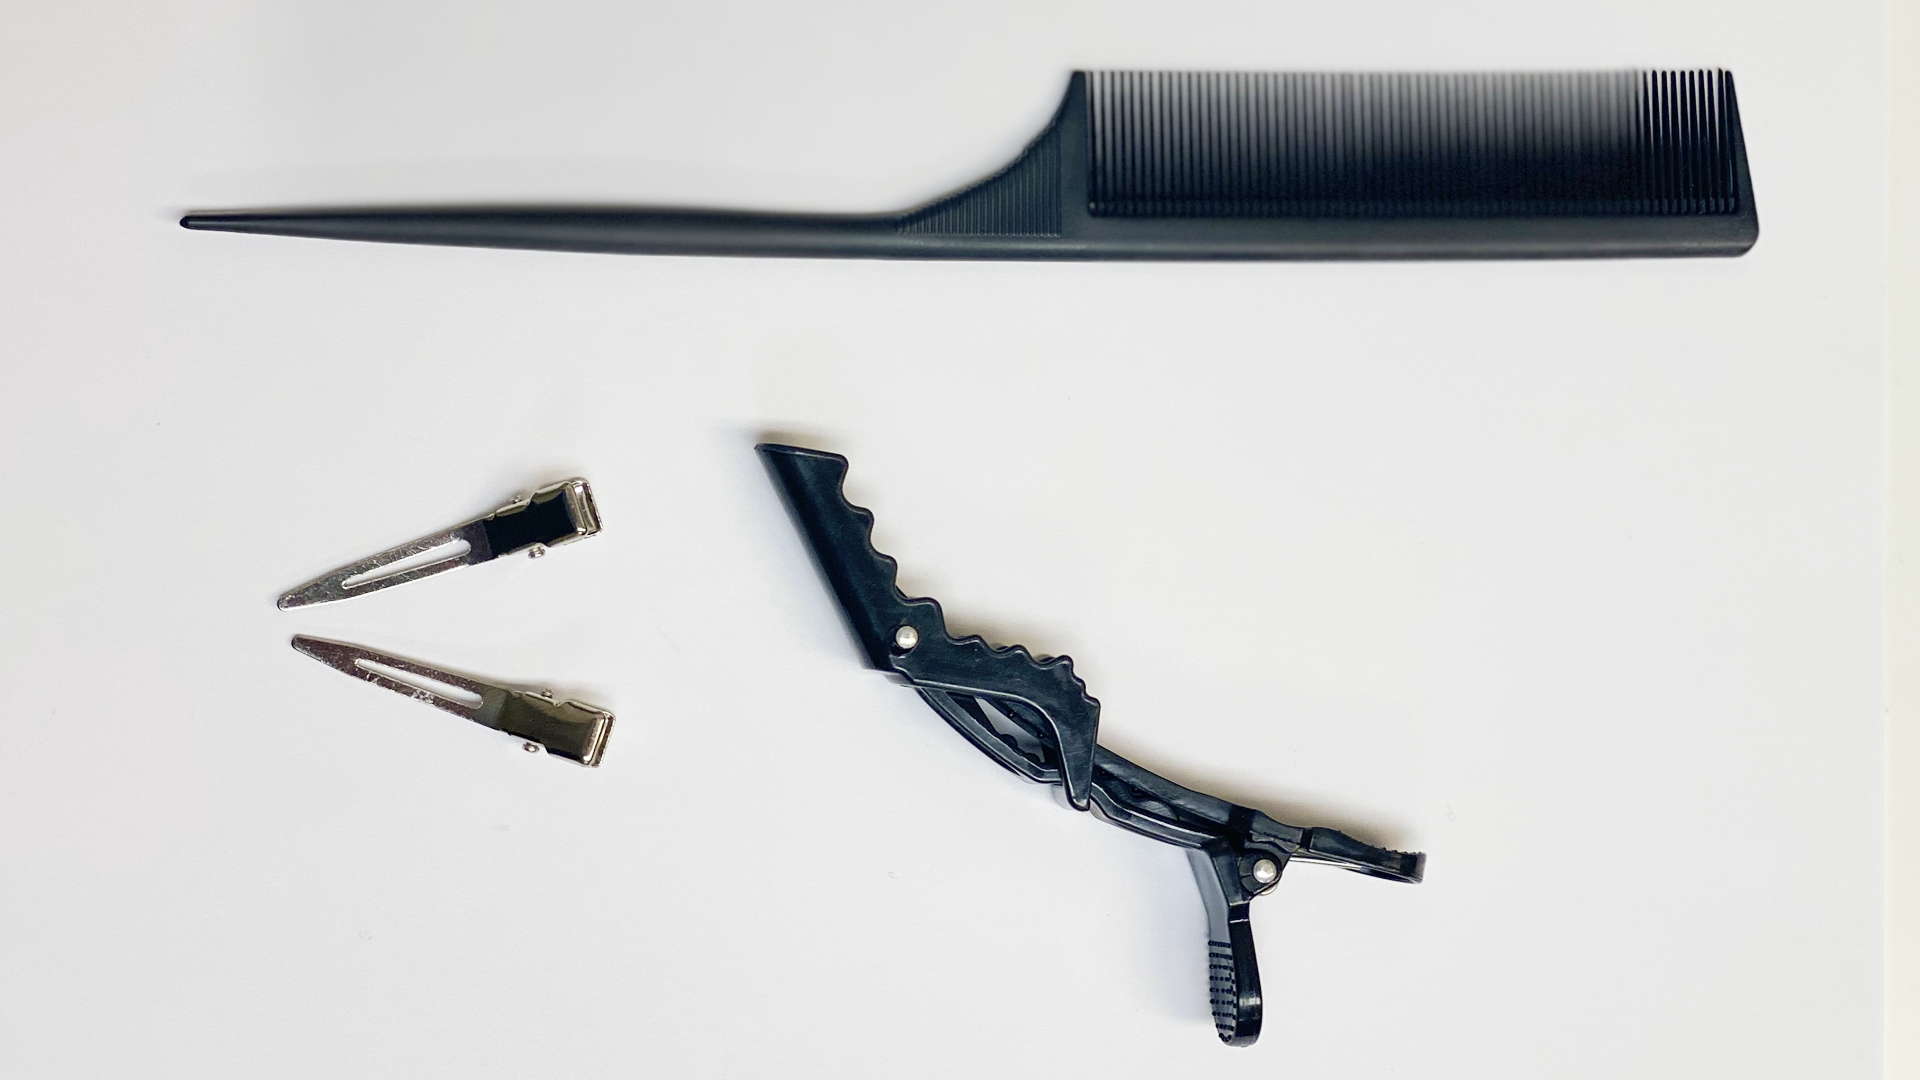
Rat tail comb
Metal Clips
Gator Clip
Hairspray
Instructions
- Begin with your rat tail comb in your dominant hand.
2. To section the bottom track, start on the right side of the front hairline, about 2-3 fingers width above their ear. Slide the end of your rattail comb through the hair & towards the back of your client’s head making a part.
3. Make the part slightly slant down going toward the back of the head.
4. Use your less dominant hand to grab the top portion of the hair you are sectioning.
5. Use the tail of the comb to continue working around the head, creating a horseshoe-like section.
6. Mimic this process on the left side of the head. The lowest point of the row should be at or just below the occipital bone.
7. Always consider the client’s hair pattern. If they have a high hairline at the nape, you can always section the hair higher. If their front hairline is thin and uneven, begin your first bead further back, making sure enough hair is available to cover the track if they want to wear their hair up.
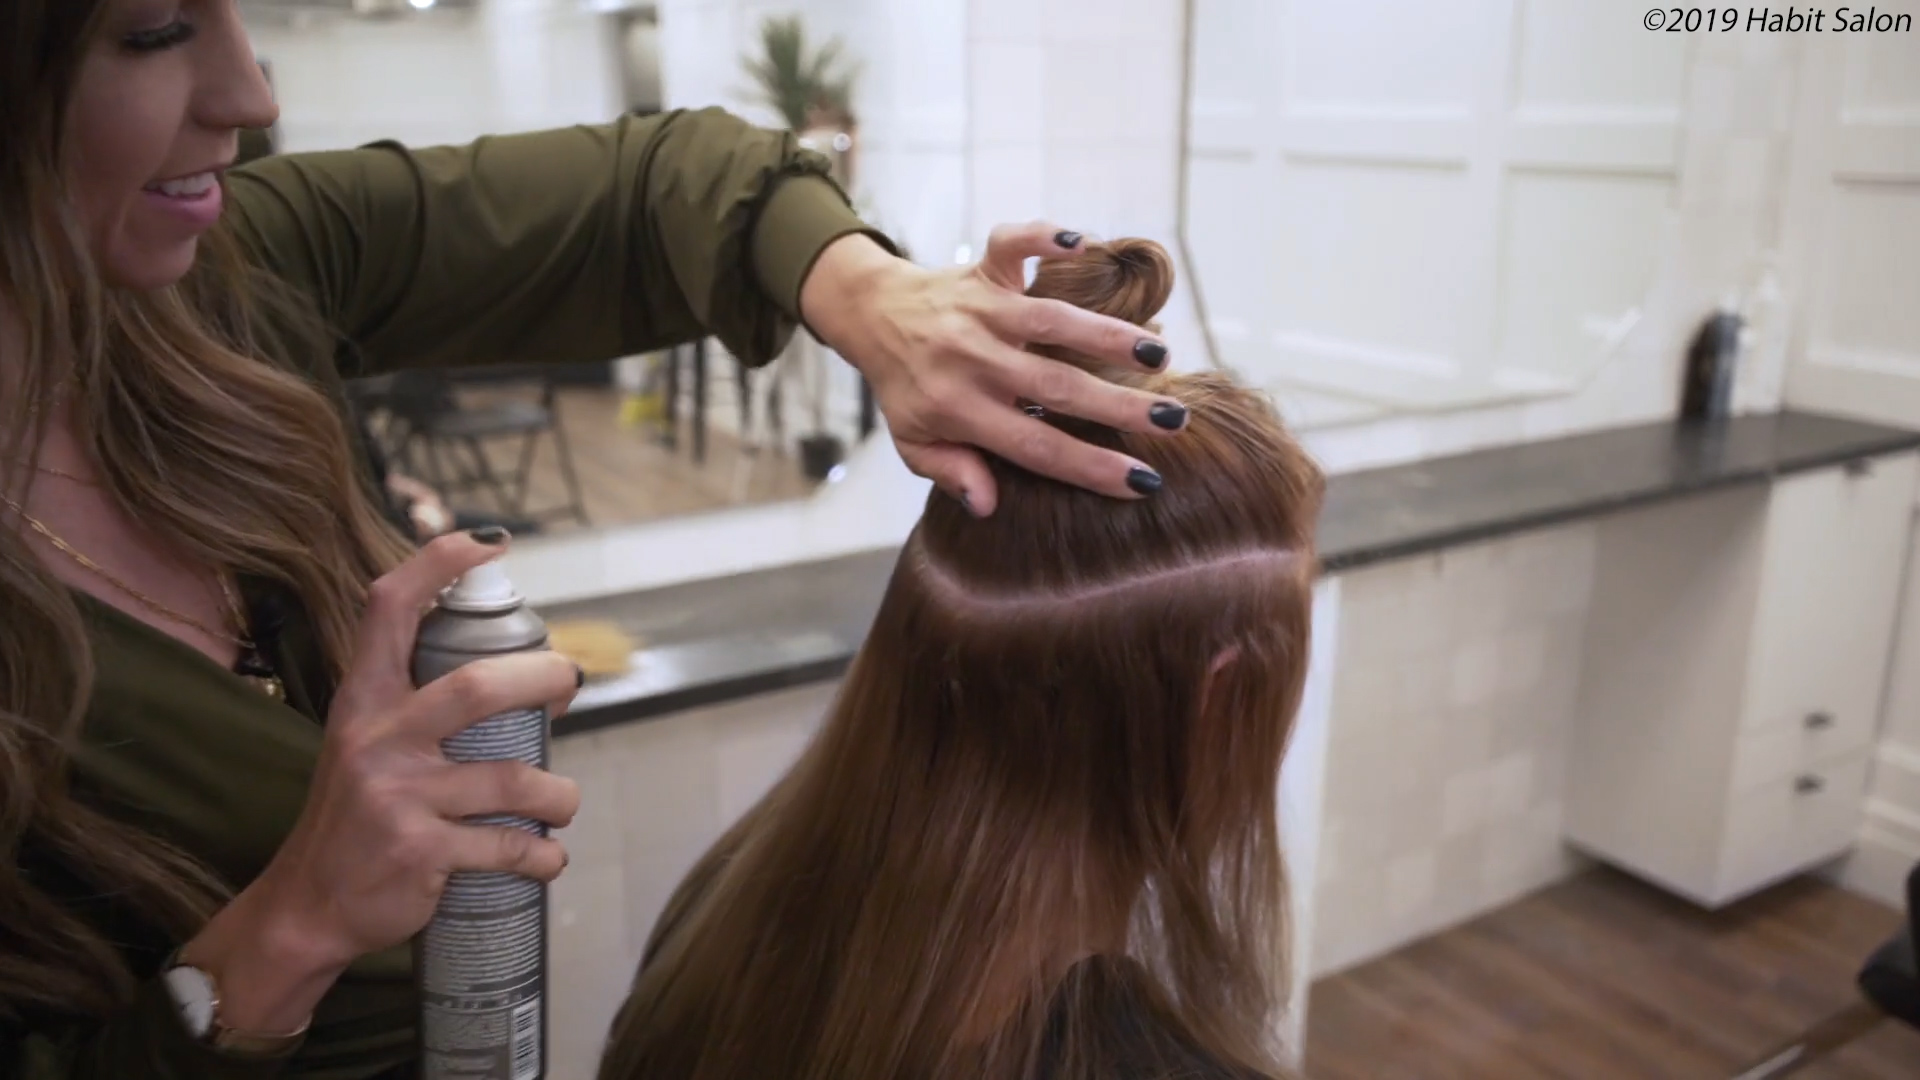
8. Use the comb tail to perfect the section. Grab hairspray and mist the sectioned area. Then comb down small flyaway hairs.
9. Once the section is almost perfect, grab all of the top hair in your less dominant hand and begin twisting into a tight bun.
10. Grab the black large clip to clip this top section.
11. Use both hands and place them on both sides of the section to feel if the sectioning is even on both sides. Use the ears as your guide.
12. Take one last look at the section and use your comb to grab any hairs that are making the section uneven.
13. Use the small metal clips to clip up any little flyaway hairs.
How to Submit Your Assignment
- Open up your text message on your phone
- Click into the message thread with your mentor
- Click on the image icon at the bottom right of the screen
- Find image on your phone or take a photo by clicking the camera button
- Click image and it will automatically upload
- Make sure to label each image by sending a message before or after stating which assignment the image is for
If you have more questions check out: https://3cc164e5-ccdb-45a4-a04e-abcc40c10196.cc10.conves.io/how-to/
Devoir 3: Couper les cheveux et se préparer pour la rangée de perles 2
Commencez votre première pratique sur votre mannequin. Après avoir regardé la vidéo The Sectioning Row 1, entraînez-vous à couper et à préparer les cheveux pour la première rangée d’extensions. Ensuite, prenez une photo de votre travail et envoyez-la à votre mentor.
Voilà ce qu’il vous faut:
Peigne à queue de rat
Clips métalliques
Clip Gator
Pulvérisation pour cheveux
Voici comment
- Commencez avec votre peigne à queue de rat dans votre main dominante.
- Pour sectionner la piste du bas, commencez sur le côté droit de la racine des cheveux avant, environ 2-3 doigts de largeur au-dessus de leur oreille. Faites glisser l’extrémité de votre peigne à queue de rat dans les cheveux et vers l’arrière de la tête de votre client en faisant une partie.
- Faites la partie légèrement inclinée vers l’arrière de la tête.
- Utilisez votre main la moins dominante pour saisir la partie supérieure des cheveux que vous coupez.
- Utilisez la queue du peigne pour continuer à travailler autour de la tête, créant une section en forme de fer à cheval.
- Imitez ce processus sur le côté gauche de la tête. Le point le plus bas de la rangée doit être au niveau ou juste en dessous de l’os occipital.
- Tenez toujours compte du modèle de cheveux du client. S’ils ont une ligne de cheveux haute au niveau de la nuque, vous pouvez toujours sectionner les cheveux plus haut. Si leur racine des cheveux avant est mince et inégale, commencez votre première perle plus en arrière, en vous assurant qu’il y a suffisamment de cheveux disponibles pour couvrir la piste s’ils veulent porter leurs cheveux.
- Utilisez la queue de peigne pour parfaire la section. Prenez de la laque et vaporisez la zone sectionnée. Ensuite, peignez les petits poils volants.
- Une fois que la section est presque parfaite, saisissez tous les cheveux du haut de votre main la moins dominante et commencez à tordre en un chignon serré.
- Prenez le grand clip noir pour clipser cette section supérieure.
- Utilisez les deux mains et placez-les des deux côtés de la section pour sentir si la coupe est uniforme des deux côtés. Utilisez les oreilles comme guide.
- Jetez un dernier coup d’œil à la section et utilisez votre peigne pour attraper les poils qui la rendent inégale.
- Utilisez les petits clips métalliques pour attacher les petits poils volants.
How to Submit Your Assignment
- Open up your text message on your phone
- Click into the message thread with your mentor
- Click on the image icon at the bottom right of the screen
- Find image on your phone or take a photo by clicking the camera button
- Click image and it will automatically upload
- Make sure to label each image by sending a message before or after stating which assignment the image is for
If you have more questions check out: https://3cc164e5-ccdb-45a4-a04e-abcc40c10196.cc10.conves.io/how-to/
Tarea 3: Dividir el pelo en secciones y prepararlo para la hilera de cuentas 2
Empieza tu práctica con un maniquí. Después de ver el vídeo División en Secciones 2, practica dividiendo el pelo en secciones y preparándolo para la segunda hilera de extensiones. Después, saca una foto de tu trabajo y envíalo a tu mentora.
Esto es lo que necesitarás:
Peine cola de ratón
Horquillas metálicas
Pinza de cocodrilo
Laca para el pelo
Así es como se hace:
- Empieza con el peine cola de ratón en tu mano dominante.
- Para dividir en secciones la hilera inferior, empieza por el lado derecho de la línea de nacimiento del pelo delantera, a unos 2-3 dedos de ancho por encima de la oreja. Desliza el extremo del peine de cola de ratón a través del pelo hacia la parte posterior de la cabeza formando una sección.
- Haz que la sección se incline ligeramente hacia abajo en dirección hacia la parte posterior de la cabeza.
- Usa tu mano menos dominante para agarrar la parte superior del pelo que estás dividiendo en secciones.
- Usa la cola del peine para seguir trabajando alrededor de la cabeza, creando una sección en forma de herradura.
- Repite este proceso en el lado izquierdo de la cabeza. El punto más bajo de la hilera debería estar en el hueso occipital o justo por debajo.
- Considera siempre el patrón de pelo de la clienta. Si el punto de nacimiento del pelo está alto en la nuca, siempre puedes dividir el pelo en secciones un poco más arriba. Si la raya frontal del pelo es fina y desigual, comienza con la primera cuenta más atrás, asegurándote de que haya suficiente pelo disponible para cubrir la raya si quiere llevar el pelo hacia arriba.
- Usa la cola del peine para perfeccionar la sección. Pulveriza la zona dividida en secciones con la laca. Después, peina los pequeños pelos sueltos.
- Una vez que la sección esté casi perfecta, agarra todo el pelo de la parte superior con tu mano menos dominante y empieza a enrollarlo formando un moño apretado.
- Utiliza la pinza grande negra para sujetar esta sección superior.
- Utiliza ambas manos y colócalas a ambos lados de la sección para determinar si la división está igualada a ambos lados. Usa las orejas como guía.
- Echa un último vistazo a la sección y utiliza tu peine para recoger los pelos que hagan que la sección no quede igualada.
- Usa las horquillas metálicas pequeñas para sujetar los pequeños pelos sueltos.
How to Submit Your Assignment
- Open up your text message on your phone
- Click into the message thread with your mentor
- Click on the image icon at the bottom right of the screen
- Find image on your phone or take a photo by clicking the camera button
- Click image and it will automatically upload
- Make sure to label each image by sending a message before or after stating which assignment the image is for
If you have more questions check out: https://3cc164e5-ccdb-45a4-a04e-abcc40c10196.cc10.conves.io/how-to/